DIY build - garage studio ALMOST DONE!
Posted: Mon Jul 15, 2013 9:00 pm
It's happening. Building the GRIMESPACE Sound Lab...
Last month, I posted a question asking what was needed to do a rehearsal / recording space in the garage. Got some great feedback from a bunch of you about it, and read some stuff on Gearslutz, John Sayers' forum, and other sites. The amount of information out there is insane, and much of it is overwhelmingly against even trying to do a rehearsal space at home without putting in major engineering and $$$.
After talking with my dad, who never let an engineering problem get in his way, we decided to give it a go. He recently retired and wants to help out with relocating my music stuff from the house so that my oldest son can take the room, as well as give us a place to jam. I say us - right now it's me and friends, but hopefully it'll be my two sons who at least seem interested in learning to play. We're hoping they'll get a band going of their own, and then they can rent from me .
.
After researching a bit and posting the question here on GAB, I came up with a few base requirements and guidelines to design from
The garage already had a smaller roll-up door (12' instead of 16'), and a partition wall running front to back, which forms a wide corridor for the laundry and pantry-type storage. My wife was not going to give up any of her space, so that, combined with our storage needs, dictates the size of the space. We decided to create a 6" air space between the outer walls, which had already been insulated and drywalled, and the new studio walls. We also had a corner brace up in the joist area that was going to keep the height below the 7-1/2' mark. We couldn't remove it, as it was structural, but a call to my uncle (I have a lot of contractors in my family) confirmed that we could cut it out and replace it with a 16 gauge piece of structural strap material. Doing so gained another 1-1/2 inches, which was worth it.
In the end, we've come up with a space that's a little over 13' by 11'. Not perfect, and still more square than acoustics say we should have, but it'll have to work. Here's a couple of illustrations.
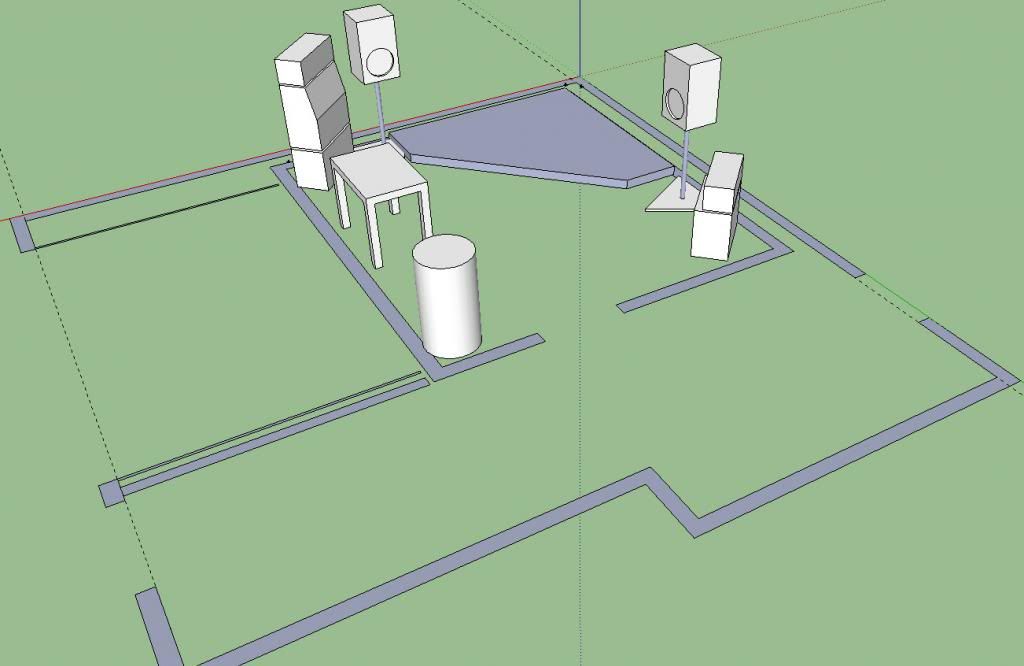
This space planning drawing is just to see how much crap I can load in. Not sure if the riser is something I'll want to commit to, but I'm guessing it may help with the thuds, since we're not doing a raised / decoupled floor. The riser would be made from 1x2 or 1x4 with schloads of rockwool stuffing, plywood or mdf, and carpet. The cylinder in the corner was representing a portable A/C unit, if it was going to have to be installed in the regular space. The garage is pretty much drawn to scale, with the laundry corridor (we call it the 'mud room') on the lower area, and the storage unit with the rolltop door on the left.
We decided to go with staggered studs as the primary means of decoupling the walls and reducing sound transmission. We are using a mix of 5/8" and 1/2" drywall (will probably be doubled on the inside), and will be insulating with two layers - standard R13 on the outer stud frames and Rockwool on the inner side. We won't be doing any major decoupling with the ceiling or floors - they'll just have to be ok. However, we'll be loading the ceiling joist bays with plenty of rockwool and capping the top with OSB / fiberboard to allow for storage.
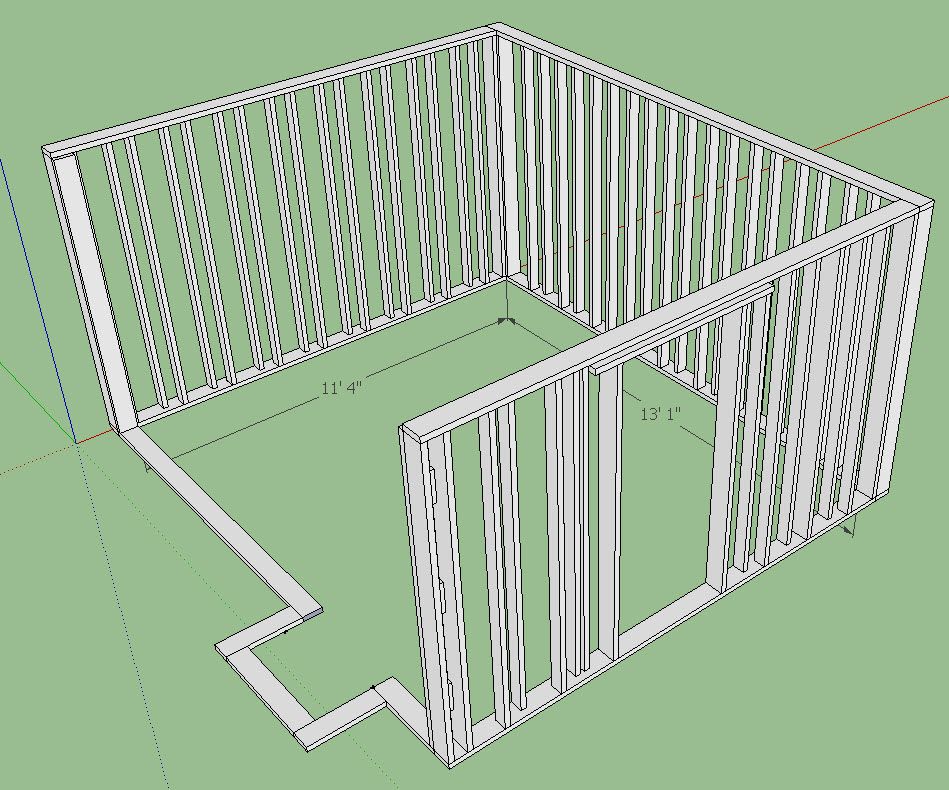
We went from design to full build about 3 weeks ago. In the next day, I'll post up some progress pics. We have 3 walls now standing, with electrical roughed-in, along with some of the thermal insulation, which we'll be combining with rockwool. This fairly accurate illustration shows the framing we've done to date, with the 4th wall outlined, which we'll be putting in (hopefully) this weekend. A/C will be a portable unit in the bumped-out area. We're going to install a doorframe that'll support two doors (hinges will be on opposite sides of the doorframe to allow for equipment flow in & out of the room).
So, what'cha think? I'd love to hear any thoughts / suggestions to make this a success. It's at the point where it's happening regardless, but I'm really anxious to give it a real run-through to see if I can rock out for real, hopefully by the beginning of August.
Last month, I posted a question asking what was needed to do a rehearsal / recording space in the garage. Got some great feedback from a bunch of you about it, and read some stuff on Gearslutz, John Sayers' forum, and other sites. The amount of information out there is insane, and much of it is overwhelmingly against even trying to do a rehearsal space at home without putting in major engineering and $$$.
After talking with my dad, who never let an engineering problem get in his way, we decided to give it a go. He recently retired and wants to help out with relocating my music stuff from the house so that my oldest son can take the room, as well as give us a place to jam. I say us - right now it's me and friends, but hopefully it'll be my two sons who at least seem interested in learning to play. We're hoping they'll get a band going of their own, and then they can rent from me
After researching a bit and posting the question here on GAB, I came up with a few base requirements and guidelines to design from
- We're keeping this as reasonable as possible - designing for sound mitigation using the room-in-a-room concept, but not expecting to make something that could double as a 24/7 operation. Jamming with a drummer and bass player with someone doing vocals will probably be the majority of higher-volume work. Might have the occasional 4- or 5-piece trying to relive our college metal days on a Saturday afternoon, but that's about the extent of it.
- Will be setting up a computer recording workstation. Will be learning to do some recording, but have no aspirations to be Abbey Road.
- The room is going to be finished - the room will be part of the house, and isn't going to be all function without form. I don't have the worlds greatest equipment, but my stuff is good, and I plan to build some guitars going forward. That and memorabilia / signed stuff will be displayed, so it's about as much a man-cave (along with my shop out back) as I'm gonna ever need.
- Cooling and heating will be addressed by either self-contained unit or some form of tie-in to the house system. Noise abatement in the supply / return system will need to be addressed.
- Complete electrical subsystem will be installed with a master shutoff for the entire room.
- Remote fire sensor to be installed.
[...] - The size will be constrained to a little more than half the usable garage area, to allow for storage shelving on the floor, and the ceiling will support other bulky items.
The garage already had a smaller roll-up door (12' instead of 16'), and a partition wall running front to back, which forms a wide corridor for the laundry and pantry-type storage. My wife was not going to give up any of her space, so that, combined with our storage needs, dictates the size of the space. We decided to create a 6" air space between the outer walls, which had already been insulated and drywalled, and the new studio walls. We also had a corner brace up in the joist area that was going to keep the height below the 7-1/2' mark. We couldn't remove it, as it was structural, but a call to my uncle (I have a lot of contractors in my family) confirmed that we could cut it out and replace it with a 16 gauge piece of structural strap material. Doing so gained another 1-1/2 inches, which was worth it.
In the end, we've come up with a space that's a little over 13' by 11'. Not perfect, and still more square than acoustics say we should have, but it'll have to work. Here's a couple of illustrations.
This space planning drawing is just to see how much crap I can load in. Not sure if the riser is something I'll want to commit to, but I'm guessing it may help with the thuds, since we're not doing a raised / decoupled floor. The riser would be made from 1x2 or 1x4 with schloads of rockwool stuffing, plywood or mdf, and carpet. The cylinder in the corner was representing a portable A/C unit, if it was going to have to be installed in the regular space. The garage is pretty much drawn to scale, with the laundry corridor (we call it the 'mud room') on the lower area, and the storage unit with the rolltop door on the left.

We decided to go with staggered studs as the primary means of decoupling the walls and reducing sound transmission. We are using a mix of 5/8" and 1/2" drywall (will probably be doubled on the inside), and will be insulating with two layers - standard R13 on the outer stud frames and Rockwool on the inner side. We won't be doing any major decoupling with the ceiling or floors - they'll just have to be ok. However, we'll be loading the ceiling joist bays with plenty of rockwool and capping the top with OSB / fiberboard to allow for storage.
We went from design to full build about 3 weeks ago. In the next day, I'll post up some progress pics. We have 3 walls now standing, with electrical roughed-in, along with some of the thermal insulation, which we'll be combining with rockwool. This fairly accurate illustration shows the framing we've done to date, with the 4th wall outlined, which we'll be putting in (hopefully) this weekend. A/C will be a portable unit in the bumped-out area. We're going to install a doorframe that'll support two doors (hinges will be on opposite sides of the doorframe to allow for equipment flow in & out of the room).

So, what'cha think? I'd love to hear any thoughts / suggestions to make this a success. It's at the point where it's happening regardless, but I'm really anxious to give it a real run-through to see if I can rock out for real, hopefully by the beginning of August.


